I tried to install regular JupyterHub about a dozen times. Each time I found myself in a morass of configuration and authentication problems, and when it came to the crunch, I could not get Python Kernel to initialize on it. Given that this was the key point of running a Jupyter Notebooks Server, it was all a bit disappointing.
Then I discovered The Little Jupyter Hub (aka TLJH) and it simply worked. It’s configuration is a little less straightforward, but my Python teaching site: https://www.pythonlessons.io is now fully up and running.
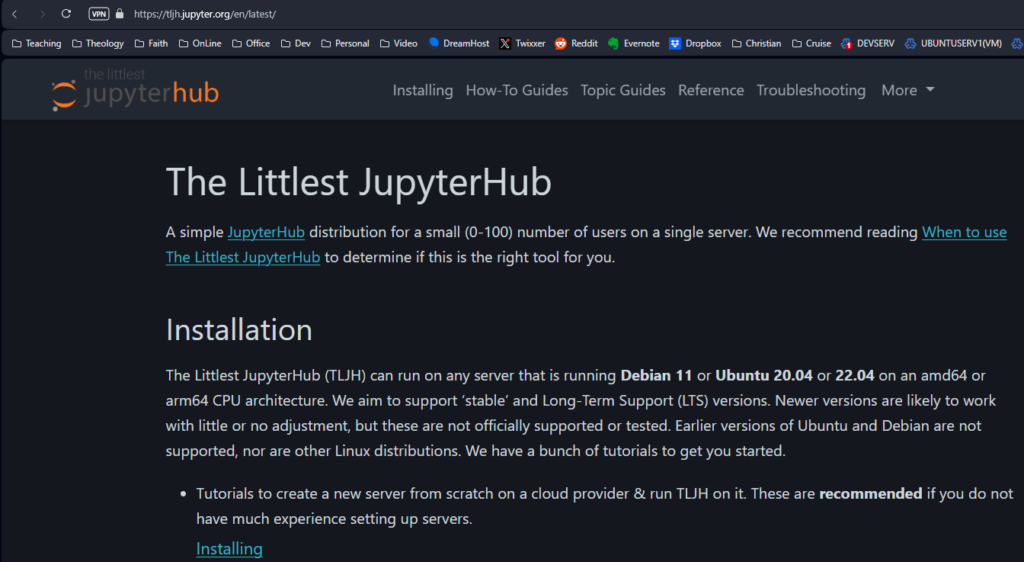
You can find the site for it here: https://tljh.jupyter.org/en/latest/ but below I will document my process and how I learned to customise the templates to give it my own (or your organization’s) look and feel.
Pre-requisites
- Some familiarity with the command line.
- A server running Ubuntu 20.04+ where you have root or sudo access (Ubuntu 22.04 LTS recommended).
- At least 1GB of RAM on your server.
- Ability to
sshinto the server & run commands from the prompt. - An IP address where the server can be reached from the browsers of your target audience.
Step 1: Installing The Littlest JupyterHub
- Using a terminal program, SSH into your server. This should give you a prompt where you can type commands.
- Make sure you have
python3,python3-dev,curlandgitinstalled.
sudo apt install python3 python3-dev git curl
3. Copy the text below, and paste it into the terminal. Replace <admin-user-name> with the name of the first admin user for this JupyterHub. Choose any name you like (don’t forget to remove the brackets!). This admin user can log in after the JupyterHub is set up, and can configure it to their needs. Remember to add your username!
curl -L https://tljh.jupyter.org/bootstrap.py | sudo -E python3 - --admin <admin-user-name>
4. Press Enter to start the installation process. This will take 5-10 minutes, and will say Done! when the installation process is complete.
5. Copy the Public IP of your server, and try accessing http://<public-ip> from your browser. If everything went well, this should give you a JupyterHub login page.
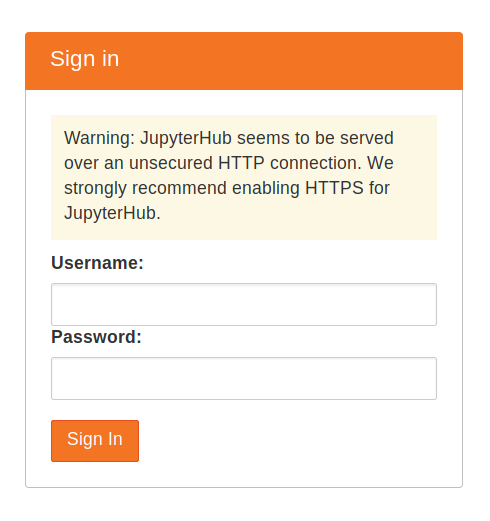
6. Login using the admin user name you used in step 3. You can choose any password that you wish. Use a strong password & note it down somewhere, since this will be the password for the admin user account from now on.
7. Congratulations, you have a running working JupyterHub!
Step 2: Adding more users
Most administration & configuration of the JupyterHub can be done from the web UI directly. Let’s add a few users who can log in!
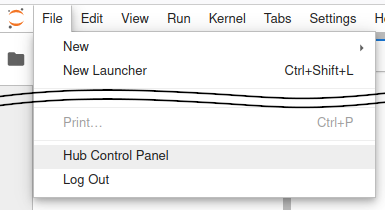
- In the File menu select the entry for the Hub Control Panel.
2. In the control panel, open the Admin link in the top left.

3. Click the Add Users button.

4. Type the names of users you want to add to this JupyterHub in the dialog box, one per line.
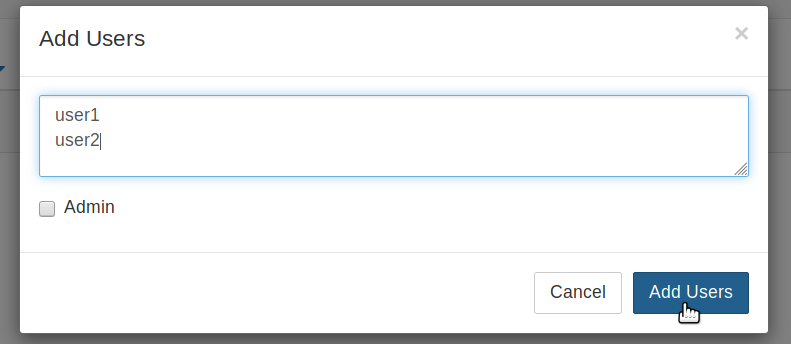
You can tick the Admin checkbox if you want to give admin rights to all these users too.
5. Click the Add Users button in the dialog box. Your users are now added to the JupyterHub! When they log in for the first time, they can set their password – and use it to log in again in the future.
Step 3: Adding a Secure Certificate
Where it says <your domain> add your domain name and <your email> add your own email
sudo apt update
sudo apt install certbot
sudo systemctl stop jupyterhub.service
sudo systemctl stop traefik.service
sudo certbot certonly --standalone -d <your domain> --email <your email> --agree-tos

sudo nano /opt/tljh/config/config.yaml
Add the following text to config.yaml:
Once again, substitute <your domain> for the actual domain name you are going to use.
https:
  enabled: true
  tls:
    cert: /etc/letsencrypt/live/<your domain>/fullchain.pem
    key: /etc/letsencrypt/live/<your domain>/privkey.pem
Then restart the configuration with:
sudo tljh-config reload proxy
sudo systemctl start jupyterhub
Test by trying to access the site with https://<your domain> and it should be ready to run!
Step 3: Change the look and feel
The files for TLJH are stored in /opt/tljh which is different to a standard JupyterHub installation, but the principles remain the same. I found that the config folder wasn’t available to me even when I tried to enter it with sudo
The solution was to take ownership of that folder (either permanently or temporarily) with
sudo chown -R <your user name>:<your user group> /opt/tljh/config
You don’t have to do this, but I like to see what’s in there…
Inside the config folder is the config.yaml we edited earlier. There is also a folder called jupyterhub_config.d which at this point is probably empty. It can contain a number of python configuration files which are processed in alphabetical order as the server operates. We need to create a file (of any name) in there. I chose templates.py
sudo nano /opt/tljh/config/jupyterhub_config.d/templates.py
In that file I put the following:
c.JupyterHub.template_paths=['/home/templates']
c.Spawner.default_url = '/lab'
c.JupyterLabApp.default_settings_overrides = {
    "theme": "JupyterLab Light"
}
The first command sets a new folder for the templates so I am able to modify them. The last two commands forces the default theme of the site to be the light theme (which matched my design much better). The user can toggle between light and dark.
You now need to copy the templates to /home/templates so you can work on them. You could put it anywhere, but I found it easier to be able to access them in a directory which was shared by Samba to my PC.
mkdir /home/templates
sudo cp -R /opt/tljh/hub/share/jupyterhub/templates/* /home/templates
You can then modify the text in these templates, and by adding a <style> css section in page.html you can override the default styles.
Here is my page.html – notice that I force these css styles with !important
 <head>
    <style>

      #login-main .auth-form-header {
        background: #cccccc !important;
      }

      .btn .btn-jupyter .form-control {
        background: #cccccc !important;
      }

      body {
        font-family: Arial, sans-serif;
        background-color: #f5f5f5;
        margin: 0;
        padding: 0;
      }

      .container {
        max-width: 500px;
        margin: 50px auto;
        padding: 20px;
        box-shadow: 0 0 10px rgba(0, 0, 0, 0.5);
        border-radius: 8px;
      }

      .auth-form-header h1 {
        text-align: center;
        color: #333333;
        margin-bottom: 20px;

      }
    .auth-form-body {
        display: flex;
        flex-direction: column;
        gap: 15px;
      }

      .form-control {
        padding: 10px;
        border: 1px solid #cccccc;
        border-radius: 4px;
        font-size: 16px;
      }

      .btn-jupyter {
        --bs-btn-bg: #cccccc !important;
        --bs-btn-border-color: #000000 !important;
        color: #000000 !important;
        border: none;
        padding: 10px;
        border-radius: 4px;
        font-size: 16px;
        cursor: pointer;
        transition: background-color 0.3s ease;
      }

      .btn-jupyter:hover {
        background-color: #0056b3;
      }

      .login_error {
        color: #ff0000;
        text-align: center;
      }

   .login_terms {
        display: flex;
        align-items: center;
        gap: 10px;
      }

      .login_terms a {
        color: #007bff;
        text-decoration: none;
      }

      .login_terms a:hover {
        text-decoration: underline;
      }

      .feedback-container {
        display: flex;
        align-items: center;
        justify-content: center;
        gap: 10px;
      }

      .feedback-widget {
        display: flex;
        align-items: center;
      }

      .fa-spinner {
        font-size: 24px;
        color: #007bff;
      }
    .pythontitle {
        font-size: 36px;
        font-weight: bold;
        color: #333333;
        text-align: center;
      }

      .borderedtext {
        border: 1px solid #cccccc;
        padding: 20px;
        border-radius: 4px;
        font-size: 16px;
        text-align: center;
        margin: 20px;
      }

      </style>
    <meta charset="utf-8">
and in login.html my changes/additions look like this:
{% else %}
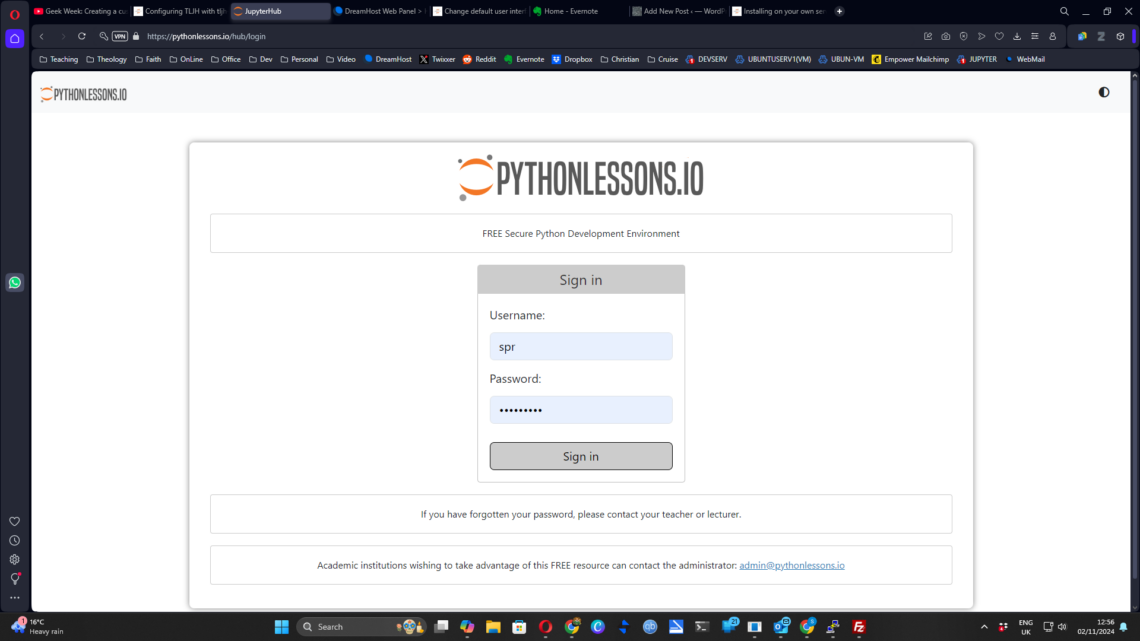
<div class="pythontitle"><img src='{{ base_url }}logo' alt='JupyterHub logo' class='jpy-logo' title='pythonlessons.io' /></div>
<div class="borderedtext">FREE Secure Python Development Environment</div>
<form action="{{ authenticator_login_url | safe }}"
method="post"
role="form">
<div class="auth-form-header">
<h1>Sign in</h1>
</div>
<div class='auth-form-body m-auto'>
<p id='insecure-login-warning' class='hidden'>
Warning: JupyterHub seems to be served over an unsecured HTTP connection.
We strongly recommend enabling HTTPS for JupyterHub.
</p>
{% if login_error %}<p class="login_error">{{ login_error }}</p>{% endif %}
<input type="hidden" name="_xsrf" value="{{ xsrf }}" />
<label for="username_input">Username:</label>
<input id="username_input"
type="text"
autocapitalize="off"
autocorrect="off"
autocomplete="username"
class="form-control"
name="username"
val="{{ username }}"
autofocus="autofocus" />
<label for='password_input'>Password:</label>
<input type="password"
class="form-control"
autocomplete="current-password"
name="password"
id="password_input" />
{% if authenticator.request_otp %}
<label for='otp_input'>{{ authenticator.otp_prompt }}</label>
<input class="form-control"
autocomplete="one-time-password"
name="otp"
id="otp_input" />
{% endif %}
<div class="feedback-container">
<input id="login_submit"
type="submit"
class='btn btn-jupyter form-control'
value='Sign in'
tabindex="3" />
<div class="feedback-widget hidden">
<i class="fa fa-spinner"></i>
</div>
</div>
{% block login_terms %}
{% if login_term_url %}
<div id="login_terms" class="login_terms">
<input type="checkbox"
id="login_terms_checkbox"
name="login_terms_checkbox"
required />
{% block login_terms_text %}
{# allow overriding the text #}
By logging into the platform you accept the <a href="{{ login_term_url }}">terms and conditions</a>.
{% endblock login_terms_text %}
</div>
{% endif %}
{% endblock login_terms %}
</div>
</form>
{% endif %}
{% endblock login_container %}
<div class="borderedtext">If you have forgotten your password, please contact your teacher or lecturer.</div>
<div class="borderedtext">Academic institutions wishing to take advantage of this FREE resource can contact the administrator: <a href="mai>
</div>
{% endblock login %}
I suppose I cheated with the logo. I could have uploaded a fresh logo and changed the call to it, but instead I edited the original and stored it in the main static files: /opt/tljh/hub/share/jupyterhub/static/images. It works, so I’m not unhappy.
End Result:

No responses yet